Shallots are a gourmet favorite in kitchens around the world, prized for their delicate flavor that blends the sweetness of onions with a hint of garlic. Growing shallots at home is surprisingly simple and deeply rewarding, whether you’re cultivating them in garden beds or containers. With the right soil, timing, and care, you can enjoy a bountiful harvest of flavorful bulbs that elevate your cooking and enrich your garden.
Understanding Shallots and Their Growing Cycle
Shallots belong to the Allium family, alongside onions, garlic, and leeks. Unlike onions, which grow from seeds or sets, shallots typically grow from individual cloves or bulbs. Each planted clove produces a cluster of new bulbs, making them a productive crop for small spaces. They thrive in cool to mild climates and prefer well-drained soil with plenty of organic matter.
The growing cycle of shallots spans several months, beginning with planting in late autumn or early spring, depending on your region. They require a period of cooler weather to establish roots before bulking up during warmer months. Most varieties mature in 90 to 120 days, with harvest typically occurring in late spring or early summer.
Choosing the Right Variety for Your Climate
Selecting the right shallot variety is essential for success. In cooler climates, traditional French varieties like ‘Griselle’ or ‘Jersey’ perform well when planted in autumn. These types overwinter and produce early harvests. In warmer regions, Asian varieties such as ‘Red Shallot’ or ‘Santan’ are better suited for spring planting and tolerate heat more effectively.
Local nurseries often stock regionally adapted varieties, and you can also source certified disease-free bulbs from reputable suppliers. Avoid planting grocery store shallots, as they may carry pathogens or be treated to prevent sprouting.
Preparing Soil and Selecting a Planting Site
Shallots thrive in loose, fertile soil with a pH between 6.0 and 7.0. Begin by clearing the planting area of weeds and debris, then work in compost or well-rotted manure to improve texture and nutrient content. Good drainage is critical, as waterlogged soil can lead to rot and fungal issues.
Choose a sunny location that receives at least six hours of direct sunlight daily. Raised beds or containers are excellent options if your native soil is heavy or clay-rich. In containers, use a mix of loamy soil and compost, ensuring the pot has adequate drainage holes.
Planting Shallots Step by Step
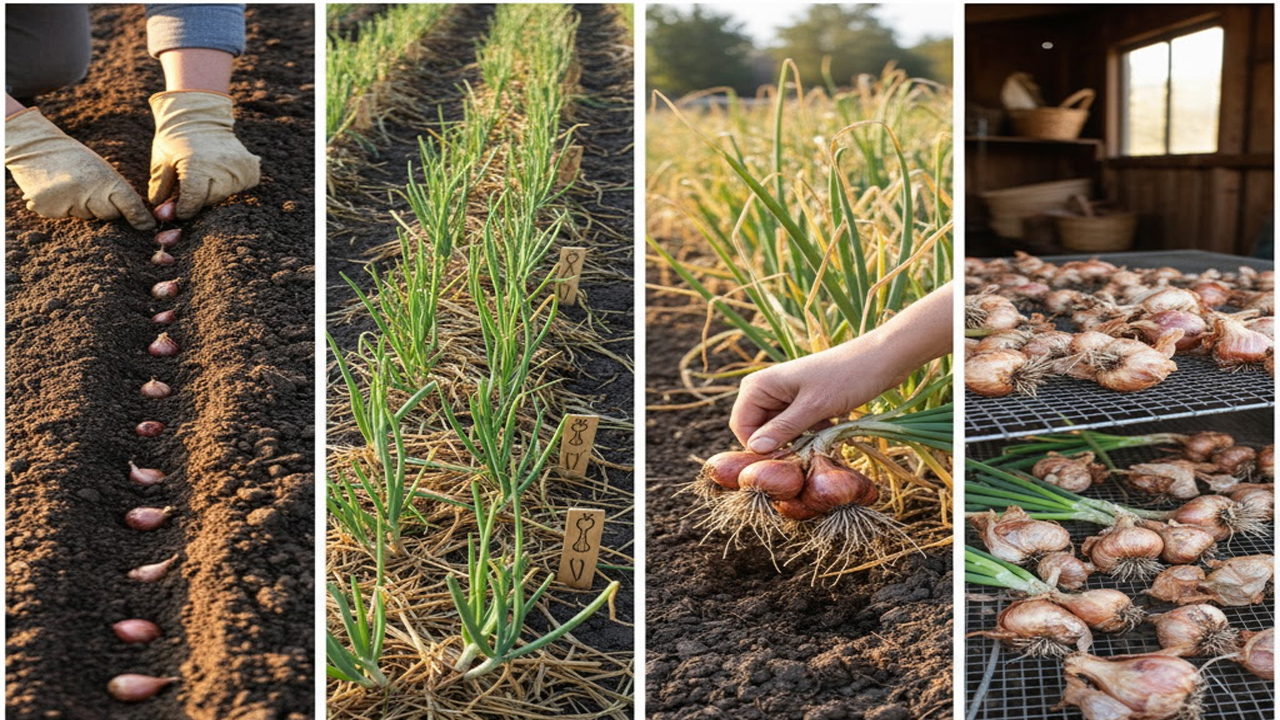
To plant shallots, separate the bulbs into individual cloves, leaving the papery skin intact. Space each clove 15 to 20 centimeters apart in rows, with rows spaced 30 centimeters apart. Plant each clove with the pointed end facing up, burying it just deep enough so the tip is visible above the soil surface.
Water gently after planting to settle the soil around the cloves. If planting in autumn, mulch lightly with straw or dry leaves to insulate the soil and prevent frost heaving. In spring, mulch helps retain moisture and suppress weeds.
Watering, Feeding, and General Care
Shallots require consistent moisture, especially during their early growth phase. Water deeply once or twice a week, depending on rainfall and temperature. Avoid overhead watering, which can promote fungal diseases. As the bulbs begin to form, reduce watering slightly to encourage firm, dry skins.
Fertilize with a balanced organic fertilizer or compost tea every three to four weeks. Avoid high-nitrogen feeds, which promote leafy growth at the expense of bulb development. Keep the area weed-free, as competition can stunt growth and reduce yields.
Monitor for pests such as onion maggots, thrips, and aphids. Use floating row covers or neem-based sprays if infestations occur. Fungal issues like downy mildew or white rot can be minimized with proper spacing, crop rotation, and good air circulation.
Signs of Maturity and When to Harvest
Shallots are ready to harvest when the tops begin to yellow and fall over naturally. This typically occurs in late spring or early summer, depending on planting time and variety. Avoid pulling them prematurely, as immature bulbs lack flavor and storage quality.
To harvest, gently loosen the soil with a fork and lift the clusters by hand. Shake off excess soil and lay the bulbs out in a dry, shaded area with good airflow. Allow them to cure for 10 to 14 days until the skins are papery and the necks are dry.
Storing Shallots for Long-Term Use
Once cured, trim the roots and tops, leaving a short neck. Store shallots in mesh bags, baskets, or crates in a cool, dry place. Ideal storage conditions are between 0°C and 4°C with low humidity. Properly stored shallots can last up to six months or longer.
Avoid storing shallots in sealed containers or plastic bags, which trap moisture and encourage rot. Check periodically for signs of sprouting or decay, and remove affected bulbs promptly.
Growing Shallots in Containers and Small Spaces
If space is limited, shallots grow beautifully in containers. Choose pots at least 20 centimeters deep with good drainage. Use a mix of compost and loamy soil, and follow the same spacing guidelines as in-ground planting. Container-grown shallots may require more frequent watering and feeding, but they’re ideal for balconies, patios, or urban gardens.
Vertical planters or grow bags also work well, especially when paired with companion crops like lettuce or herbs. Shallots are relatively pest-resistant and make excellent neighbors in mixed plantings.
Companion Planting and Crop Rotation Tips
Shallots benefit from companion planting with carrots, beets, lettuce, and strawberries. Avoid planting near legumes like peas and beans, which may compete for nutrients. Incorporating shallots into a crop rotation plan helps prevent soil-borne diseases and maintains soil fertility.
Rotate shallots with non-Allium crops such as leafy greens, brassicas, or root vegetables. Avoid planting shallots in the same spot more than once every three years to reduce the risk of white rot and other persistent pathogens.
Final Thoughts on Growing Flavorful Shallots
Growing shallots is a satisfying endeavor for gardeners of all skill levels. With minimal effort and attention to detail, you can produce a generous harvest of aromatic bulbs that enhance your culinary creations. Whether tucked into raised beds or thriving in pots on a sunny balcony, shallots reward patience with flavor, resilience, and beauty.
From selecting the right variety to mastering the harvest, each step in the shallot-growing journey offers a chance to connect with your garden and enjoy the fruits of your labor. With this guide in hand, you’re well-equipped to cultivate shallots that are as delicious as they are easy to grow.