Chervil, often referred to as French parsley, is a delicate annual herb that belongs to the Apiaceae family. With its subtle anise-like flavor and feathery leaves, chervil is a staple in French cuisine and an essential component of the classic fines herbes blend. Despite its culinary prestige, chervil remains underutilized in many home gardens. This guide aims to change that by offering a comprehensive, practical approach to growing chervil successfully, whether in garden beds, containers, or kitchen windowsills.
Understanding Chervil’s Growing Requirements
Chervil thrives in cool, moist conditions and prefers partial shade over full sun. Unlike its cousins parsley and cilantro, chervil is sensitive to heat and bolts quickly in warm weather. It grows best in spring and fall when temperatures range between 10°C and 20°C. The soil should be rich in organic matter, well-draining, and slightly acidic to neutral with a pH between 6.0 and 7.0. Because of its shallow root system, chervil benefits from consistent moisture and gentle care.
Choosing the Right Location and Soil Preparation
To grow chervil successfully, choose a location that receives morning sun and afternoon shade. If you’re gardening in a hot climate, consider planting chervil in a spot that remains shaded throughout the day or use shade cloth to protect it from intense sunlight. Raised beds or containers are excellent choices, especially if your native soil is heavy or clay-based.
Prepare the soil by loosening it to a depth of 20 cm and incorporating compost or well-rotted manure. This improves drainage and boosts nutrient availability. Avoid using high-nitrogen fertilizers, which can lead to excessive leaf growth with diminished flavor. Instead, opt for balanced organic fertilizers or compost tea during the growing season.
Sowing Chervil Seeds: Timing and Technique
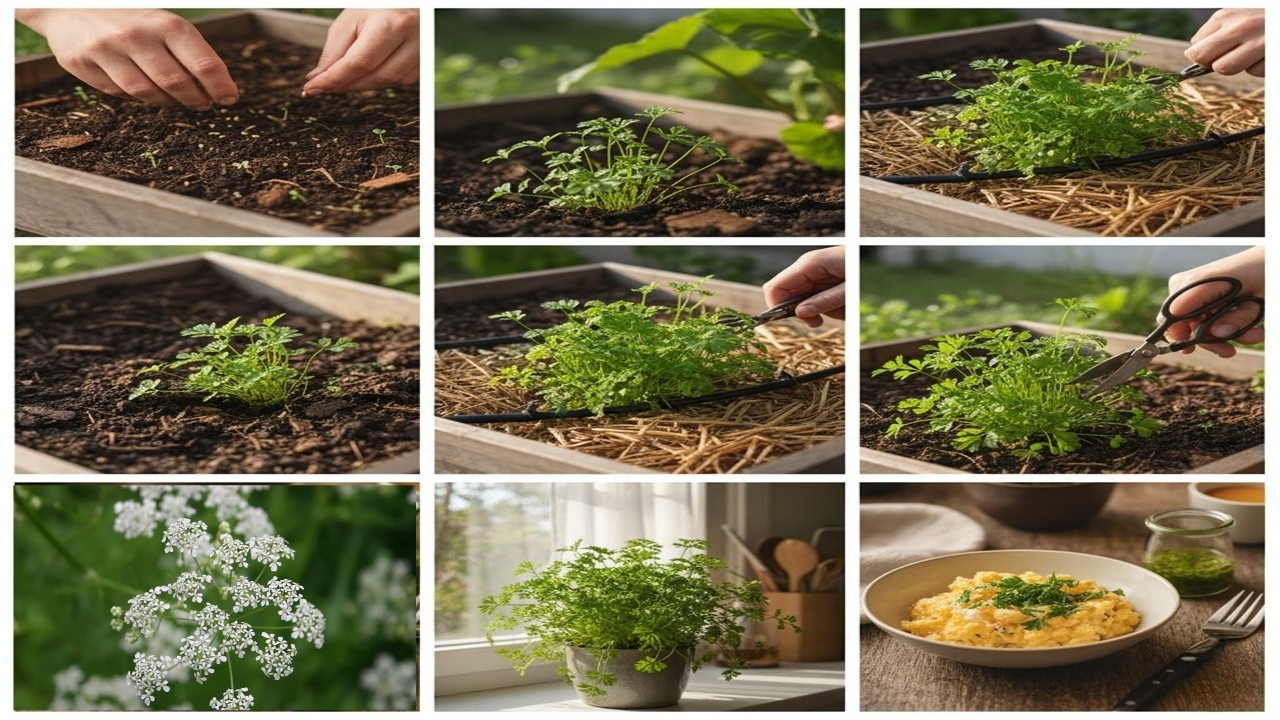
Chervil is best grown from seed, as it does not transplant well due to its fragile taproot. Direct sowing is recommended. Begin by sowing seeds in early spring as soon as the soil can be worked, or in late summer for a fall crop. In tropical regions, sowing during the cooler months ensures better germination and growth.
Scatter seeds thinly over the prepared soil and cover them lightly with 0.5 cm of fine soil. Water gently to avoid displacing the seeds. Germination typically occurs within 7 to 14 days. To ensure a continuous supply, sow seeds every two to three weeks throughout the growing season.
Caring for Chervil Plants
Once seedlings emerge, thin them to 15 cm apart to allow adequate airflow and reduce competition. Chervil requires consistent moisture, so water regularly, especially during dry spells. Mulching around the plants helps retain soil moisture and suppress weeds. Avoid overhead watering, which can encourage fungal diseases; instead, use drip irrigation or water at the base.
Chervil is relatively pest-free but may occasionally attract aphids or slugs. Aphids can be controlled with neem oil or insecticidal soap, while slugs can be deterred using crushed eggshells or copper tape around containers. Keep an eye out for powdery mildew, especially in humid conditions, and remove affected leaves promptly.
Preventing Bolting and Extending the Harvest
Bolting, or premature flowering, is a common issue with chervil, especially in warm weather. To delay bolting, maintain consistent soil moisture, provide shade, and avoid stress from overcrowding or nutrient imbalances. Once chervil bolts, the leaves become bitter and unsuitable for culinary use.
To extend the harvest, pinch off flower stalks as soon as they appear. Regular harvesting of outer leaves also encourages new growth. Succession planting every few weeks ensures a steady supply of fresh chervil throughout the season.
Harvesting Chervil for Maximum Flavor
Chervil is ready to harvest about six to eight weeks after sowing. Use scissors to snip the outer leaves, leaving the inner growth intact. Morning harvests yield the best flavor, as essential oils are most concentrated before the heat of the day.
For peak culinary quality, use chervil fresh. Its delicate flavor dissipates quickly when dried or cooked for long periods. If you must preserve it, freezing in ice cube trays with water or olive oil is preferable to drying.
Culinary Uses of Chervil
Chervil’s subtle flavor makes it ideal for enhancing dishes without overpowering them. It pairs beautifully with eggs, fish, poultry, and spring vegetables. Add chopped chervil to omelets, soups, and sauces just before serving to preserve its aroma. It’s a key ingredient in béarnaise sauce and elevates simple vinaigrettes with a refined herbal note.
In French cuisine, chervil is part of the fines herbes blend, along with parsley, tarragon, and chives. This combination is used to season delicate dishes like scrambled eggs, cream-based sauces, and steamed vegetables. Chervil also complements goat cheese, fresh salads, and herb butters.
Growing Chervil Indoors and in Containers
For gardeners with limited space or harsh outdoor conditions, chervil grows well indoors. Choose a wide, shallow container with good drainage and fill it with a light potting mix enriched with compost. Place the container near a bright window that receives indirect sunlight or under grow lights for 12 to 14 hours daily.
Indoor chervil requires careful watering to avoid root rot. Allow the top layer of soil to dry slightly between waterings. Fertilize monthly with a diluted liquid organic fertilizer. Rotate the container periodically to ensure even growth and prevent legginess.
Saving Seeds and Encouraging Self-Sowing
If you allow a few chervil plants to flower and set seed, you can collect seeds for future planting. Wait until the seed heads turn brown and dry, then cut them and place in a paper bag to finish drying. Once fully dry, shake the bag to release the seeds and store them in a cool, dark place.
Chervil also self-sows readily in suitable conditions. If left undisturbed, it can naturalize in shaded garden corners, providing a spontaneous crop each season. However, to maintain flavor and vigor, it’s best to refresh your seed stock every year.
Common Mistakes to Avoid
Many gardeners struggle with chervil due to its sensitivity to heat and transplanting. Avoid starting seeds indoors for later transplanting, as this often leads to stunted growth. Don’t over-fertilize, which can dilute flavor and encourage bolting. Ensure adequate spacing and airflow to prevent disease, and never let the soil dry out completely.
Another common mistake is harvesting too late. Once chervil begins to flower, the leaves lose their culinary appeal. Timely harvesting and succession planting are key to enjoying this herb at its best.
Final Thoughts on Growing Chervil
Chervil may be delicate, but with the right conditions and care, it rewards gardeners with a refined herb that elevates everyday cooking. Its graceful foliage and subtle flavor make it a charming addition to herb gardens, containers, and kitchen windowsills. By understanding its preferences and avoiding common pitfalls, you can enjoy fresh chervil throughout the growing season and bring a touch of French elegance to your meals.