

Join on WhatsApp
Get the latest updates directly on WhatsApp – motivation, news & more!
 Join On WhatsApp
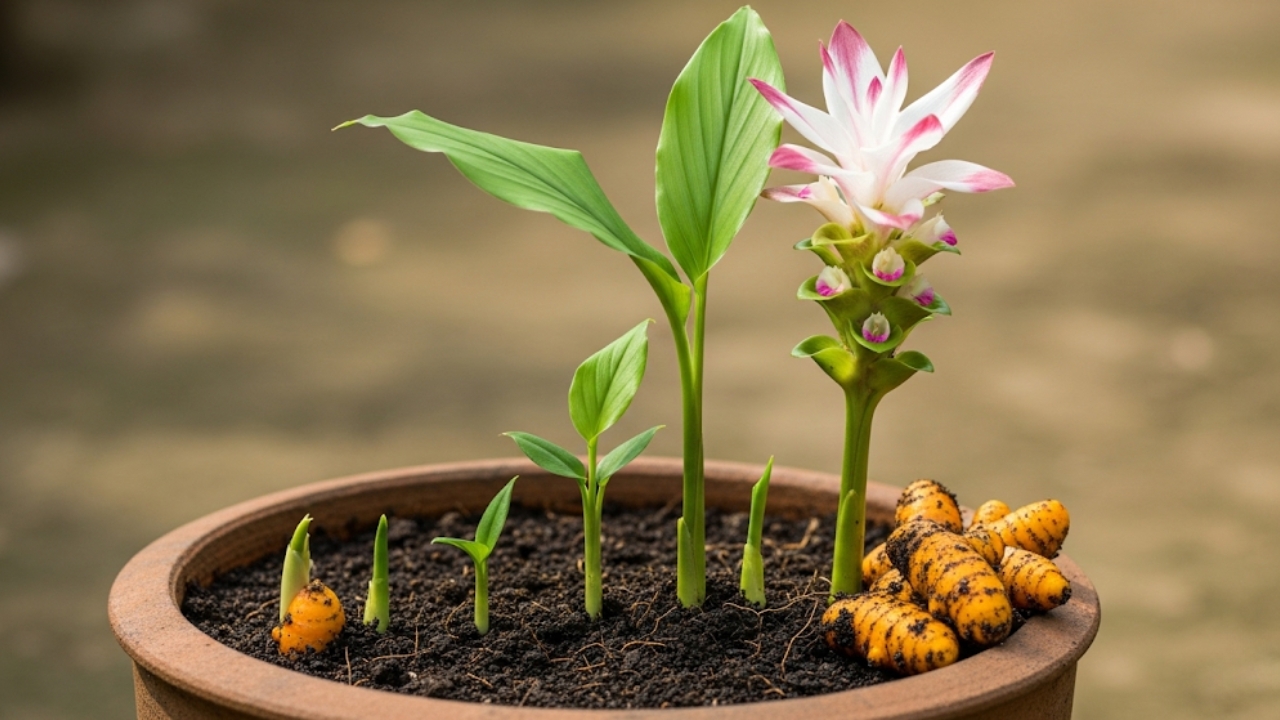
Turmeric is one of the most valuable and ancient medicinal plants, widely known for its healing properties and culinary uses. It belongs to the ginger family and is primarily grown for its rhizomes, which are packed with curcumin, the compound responsible for its rich yellow color and health benefits. Growing turmeric at home is not only rewarding but also surprisingly simple if you provide the right growing conditions. Whether you have a garden or a few large containers, turmeric can be successfully cultivated with a little care and patience.
Choosing the Right Turmeric Root
The first step in growing turmeric is selecting good quality rhizomes. Always buy plump, healthy roots that have small buds or eyes on them. These buds are the growing points from which new shoots will emerge. Avoid roots that are shriveled, diseased, or moldy. You can source turmeric roots from a local farmer’s market, garden stores, or organic shops. It is always best to choose pesticide-free and organic roots for healthier plants and safer consumption.
Climate and Soil Requirements
Turmeric thrives in warm, humid climates and needs plenty of indirect sunlight. It grows best in tropical and subtropical regions, but it can also be grown in pots indoors in cooler climates. The ideal temperature range is between 20 to 35 degrees Celsius.
Soil plays a crucial role in turmeric growth. The plant prefers well-draining, loamy soil that is rich in organic matter. A slightly acidic to neutral soil pH between 5.5 and 7.0 works best. Before planting, enrich the soil with compost or well-rotted manure to ensure adequate nutrients for root development.
Preparing the Soil or Container
If you are planting in the ground, loosen the soil to a depth of at least 12 inches and mix in organic compost. This ensures proper aeration and easy growth of rhizomes. For container gardening, choose a large pot that is at least 12 to 14 inches deep and wide. Turmeric needs space to spread underground, so avoid small pots. Make sure the container has proper drainage holes to prevent waterlogging, as excess water can cause root rot.
Planting Turmeric Roots
Cut the rhizomes into small pieces, each with at least one or two buds. Allow the cut pieces to dry for a day to prevent fungal infections. Plant the rhizomes 2 to 3 inches deep in the soil, with the buds facing upward. Space them about 6 inches apart to give enough room for growth.
Water the soil lightly after planting and keep it moist but not soggy. In cooler climates, it is better to plant turmeric indoors in early spring and then move the pots outside once the temperature rises. In warmer regions, planting can be done directly outdoors at the beginning of the rainy season.
Watering and Moisture Management
Turmeric requires consistent moisture throughout its growing cycle. Water the plants regularly, especially during dry periods, to keep the soil slightly damp. However, overwatering should be avoided because it can lead to root rot. Mulching with straw, leaves, or grass clippings helps retain soil moisture and keeps the temperature stable.
Sunlight and Temperature Needs
Turmeric grows best in partial to full sunlight. Ideally, it should receive at least 6 to 8 hours of indirect sunlight daily. If grown indoors, place the pot near a bright window where it can get filtered sunlight. Turmeric is sensitive to frost, so if you live in a cold region, bring the pots indoors during winter or cover the plants with protective sheets.
Fertilization for Healthy Growth
Feeding turmeric plants with organic fertilizers helps boost their growth. You can apply compost, cow manure, or a balanced liquid fertilizer every few weeks. Nitrogen-rich fertilizers encourage leafy growth, while potassium and phosphorus support root development. Avoid excessive chemical fertilizers, as they can harm the natural flavor and medicinal value of the rhizomes.
Managing Pests and Diseases
Turmeric is generally resistant to most pests, but it can sometimes be affected by aphids, leaf rollers, or scale insects. Using neem oil spray is an effective organic solution to control pests. The most common disease in turmeric is leaf blotch, which can be managed by removing infected leaves and ensuring good air circulation around the plants. Keeping the soil well-drained reduces the risk of fungal infections and rhizome rot.
Growth Cycle and Plant Care
Turmeric is a slow-growing plant with a long cultivation period. It usually takes 8 to 10 months to mature. During the early stages, you will notice green shoots emerging from the soil, followed by broad leaves that resemble those of ginger or banana plants. Regular watering, occasional feeding, and weed control are essential during this period. As the plants mature, the leaves will start turning yellow and drying up, which is a natural sign that the roots are ready for harvest.
Harvesting Turmeric
Turmeric is usually ready for harvest 8 to 10 months after planting, depending on the climate and growing conditions. The best time to harvest is when most of the leaves have turned yellow and started to dry. Carefully dig around the base of the plant and lift the clump of rhizomes from the soil. Shake off excess soil and separate the roots from the plant. If you are growing in pots, simply empty the container and collect the rhizomes.
Post Harvest Processing
After harvesting, wash the rhizomes thoroughly to remove soil. Boil them in water for about 45 minutes to an hour, which helps enhance their color and aroma. Once boiled, allow them to dry in the sun for 10 to 15 days until they become hard. After drying, the rhizomes can be ground into turmeric powder or stored as whole dried roots for later use.
Saving Seed Rhizomes for Next Season
If you plan to grow turmeric again, set aside some healthy rhizomes from the harvest to use as planting material for the next season. Store them in a cool, dry place until it is time for replanting. This way, you can create a continuous cycle of turmeric cultivation at home without having to purchase new roots each year.
Health and Culinary Uses of Turmeric
Freshly harvested turmeric can be used in curries, teas, smoothies, and pickles. It is not only a popular spice but also a powerful medicinal herb known for its anti-inflammatory, antioxidant, and digestive benefits. Drinking turmeric tea or adding fresh turmeric to milk is a common home remedy for colds and joint pain. With homegrown turmeric, you get the advantage of pure, chemical-free rhizomes with maximum nutritional value.
Tips for Growing Turmeric Successfully
To achieve the best results, always start with healthy planting material and ensure the soil remains fertile and well-drained. Maintain regular watering, provide sufficient sunlight, and keep the plants safe from frost. Patience is key because turmeric takes time to mature, but the reward of harvesting your own golden spice makes the effort worthwhile.
Conclusion
Growing turmeric at home is an enriching experience that combines gardening with health benefits. From planting small rhizomes to harvesting golden roots, the entire process is simple yet rewarding. With the right climate, soil preparation, and care, you can produce your own supply of organic turmeric. Not only does it enhance your kitchen recipes, but it also strengthens your health naturally. Once you master the process, you can look forward to a fresh harvest every year, ensuring a steady supply of this valuable spice.