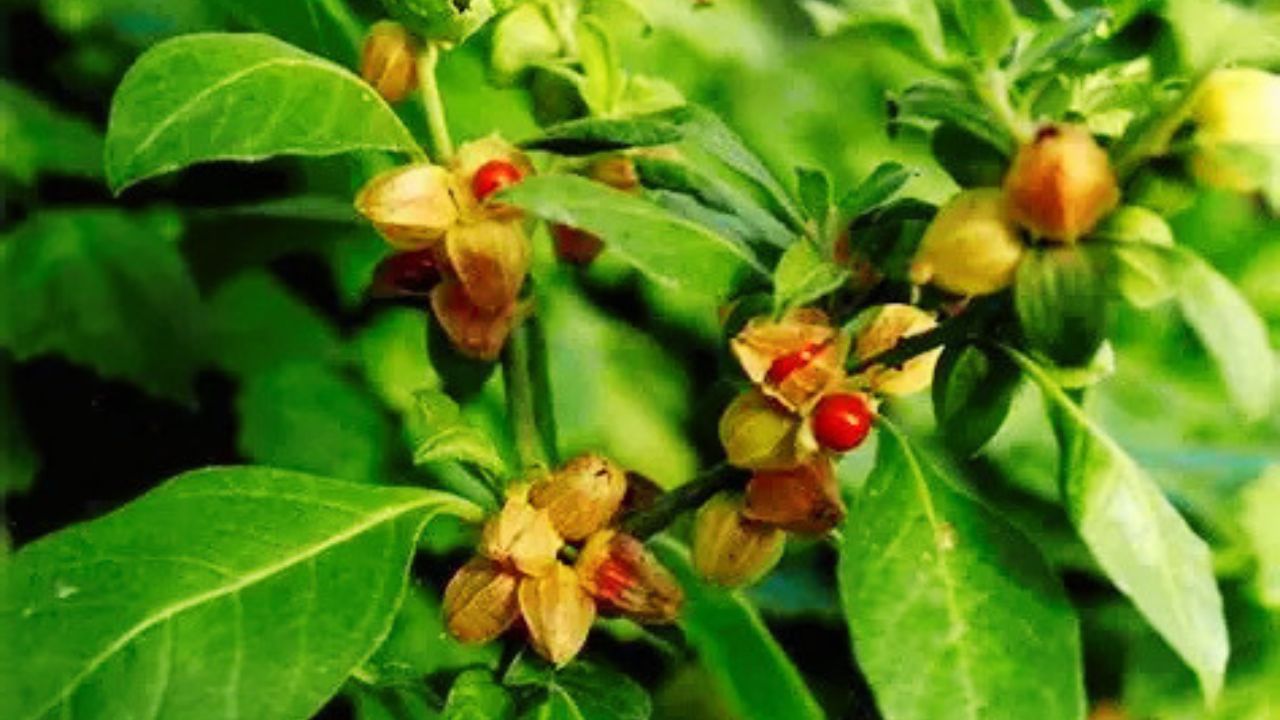
Ashwagandha, botanically known as Withania somnifera, is a hardy herb that has been grown for centuries in warm, relatively dry regions. It is valued for its roots and is also attractive as a home garden plant because it does not require complicated care once established. With the right soil, warmth, sunlight, and watering routine, it can grow successfully in a garden bed, raised bed, or suitably sized container.
Ashwagandha naturally prefers conditions that resemble its native growing environment. It performs best in warm weather, plenty of sunlight, and soil that drains quickly. The biggest mistake beginners make is treating it like a moisture-loving plant. Excess water can create problems for the roots, while consistently warm conditions encourage steady growth.
Choosing the Right Location for Ashwagandha
Select a location that receives plenty of direct sunlight throughout the day. Around six to eight hours of sunlight is a good target for vigorous growth. A sunny garden bed, balcony, terrace, or warm patio can work well as long as the plant receives adequate light.
Good air circulation is also helpful. Avoid placing plants in a consistently damp or poorly ventilated corner because excessive humidity combined with wet soil can encourage fungal problems. If you are growing several plants, leave enough space between them so their foliage is not constantly crowded.
For container growing, choose a location where the pot can receive direct sunlight and where excess water can easily drain away. Ashwagandha appreciates warmth, so planting should ideally be timed after the danger of cold temperatures has passed.
Preparing the Best Soil for Ashwagandha
Well-draining soil is one of the most important requirements for healthy ashwagandha. The plant develops a valuable root system, and those roots need access to air as well as moisture. Heavy, compacted soil that remains wet for long periods can slow growth and increase the risk of root problems.
A loose garden soil mixed with mature compost can provide a good starting point. If your soil contains a lot of clay, improve its structure with organic matter and materials that encourage drainage. The goal is a soil mixture that holds enough moisture for the plant without becoming waterlogged.
Ashwagandha generally prefers soil that is around neutral to slightly alkaline, although it can tolerate a reasonable range of conditions. Before planting, remove large stones, weeds, and compacted material. Breaking up the soil thoroughly gives young roots an easier path for development.
Starting Ashwagandha From Seeds
Ashwagandha is commonly grown from seed. Use fresh, good-quality seeds and sow them in prepared soil or seed-starting containers. Seeds should be placed shallowly rather than buried deeply because young seedlings need to emerge easily.
Keep the seed-starting medium lightly moist while the seeds are germinating. Avoid soaking the soil. Under warm conditions, germination can occur within a couple of weeks, although the exact timing depends on seed quality, temperature, moisture, and growing conditions.
Once seedlings appear, provide strong light and good airflow. If several seedlings emerge close together, thin them carefully so the strongest plants have enough room to develop. Handle young plants gently because their early root systems are still developing.
Transplanting Young Ashwagandha Plants
If you started seeds in trays or small containers, transplant the seedlings once they are established and large enough to handle safely. Choose a warm day and water the seedlings lightly before transplanting so the root ball is less likely to break apart.
Prepare planting holes that are large enough to accommodate the roots without bending or crushing them. Place each plant at approximately the same depth at which it was previously growing. Gently firm the soil around the roots and water lightly.
Avoid excessive watering immediately after transplanting. The soil should be comfortably moist but not saturated. Once the plant settles into its new location, allow the surface of the soil to dry somewhat between waterings.
Providing the Right Amount of Sunlight
Sunlight plays a major role in the growth and overall strength of ashwagandha. A plant receiving sufficient direct light will generally develop more compact growth and stronger stems than one kept in deep shade.
Aim for roughly six to eight hours of direct sunlight when possible. In extremely hot climates, afternoon conditions can become intense, particularly for container-grown plants. Watch the foliage for signs of severe heat stress and make sure the container does not dry out excessively.
Plants grown indoors may struggle if they do not receive enough natural light. A bright, sunny window can work in some situations, but outdoor cultivation is generally easier when local weather conditions are suitable.
Watering Ashwagandha Correctly
Ashwagandha is relatively drought-tolerant once established, so watering should be moderate rather than frequent. Allow the upper portion of the soil to dry before watering again. When you do water, apply enough to moisten the root zone, then allow excess water to drain away.
Young plants require more consistent moisture than established plants because their roots have not yet reached deeper into the soil. During the early stages, check the soil regularly and prevent it from becoming completely dry for extended periods.
As the plant matures, gradually reduce unnecessary watering. Rainfall may provide much of the moisture needed during wet periods. Container-grown plants usually require more attention because pots can dry out faster than garden soil.
Feeding Ashwagandha for Healthy Growth
Ashwagandha generally does not require heavy fertilization. Too much fertilizer can encourage excessive leafy growth without necessarily improving root development. A moderate amount of mature compost incorporated into the soil before planting can provide useful nutrients.
If the plant appears weak or growth is unusually slow, a balanced fertilizer can be applied sparingly according to its product directions. Avoid repeated heavy applications, particularly late in the growing season.
Healthy soil is often more important than frequent feeding. Organic matter improves soil structure and supports gradual nutrient availability while also helping the soil maintain a balanced moisture level.
Managing Weeds and Protecting the Plants
Weeds compete with young ashwagandha plants for sunlight, water, and nutrients. Keep the planting area relatively free of weeds, especially while the seedlings are small. Pull weeds carefully rather than disturbing the developing roots.
A light layer of organic mulch can help suppress weeds and reduce moisture loss. However, avoid piling mulch directly against the stem. Excessive moisture around the base of the plant can create an environment where disease problems are more likely.
Regularly inspect the leaves and stems for unusual spots, discoloration, wilting, or insect activity. Good spacing, proper watering, and adequate airflow are useful preventive measures.
Growing Ashwagandha in Containers
Ashwagandha can be grown successfully in containers if the pot provides enough room for its roots. Select a container with several drainage holes and sufficient depth for the developing root system. A larger container is generally preferable to a very small pot.
Use a loose, well-draining potting mixture rather than dense garden soil alone. Position the container in a sunny location and monitor moisture more frequently than you would in an outdoor garden bed.
Container plants may need occasional feeding because nutrients can become depleted over time. However, fertilize moderately and always prioritize good drainage. If roots begin filling the container excessively, the plant may need a larger growing space.
Common Problems When Growing Ashwagandha
Overwatering is one of the most common problems. Yellowing leaves, slow growth, wilting despite wet soil, and unpleasant-smelling roots can indicate that the soil is staying too wet. Improve drainage and allow the growing medium to dry appropriately between waterings.
Insufficient sunlight can result in weak, stretched growth. Moving the plant to a brighter location can help if environmental conditions allow. Poor soil can also restrict root development, especially when it is compacted or drains slowly.
Pests may occasionally affect the foliage. Regular observation makes it easier to notice problems early. Remove badly affected plant material where appropriate and maintain good garden hygiene.
Knowing When Ashwagandha Is Ready to Harvest
Ashwagandha is usually grown for its roots, so harvesting should be timed according to the plant’s maturity rather than simply picking leaves. Depending on growing conditions, plants commonly need several months to develop sufficiently mature roots.
A useful sign of maturity is the natural yellowing and drying of the foliage toward the end of the growing period. This indicates that the plant is moving toward dormancy and that the root system has had time to develop.
Before harvesting an entire crop, gently expose a small portion of the soil near one plant to inspect the root development. Mature roots should have a well-developed structure and noticeable size.
How to Harvest and Prepare Ashwagandha Roots
Choose a relatively dry period for harvesting when practical. Loosen the soil around the plant carefully with a garden fork or hand tool, working far enough away from the main root to reduce damage. Lift the plant gradually rather than pulling forcefully on the stem.
Shake away loose soil and clean the harvested roots carefully. Remove damaged portions and separate the roots according to size. If you intend to dry them, cut larger roots into smaller sections to encourage more even drying.
Dry the roots thoroughly in a clean, dry, well-ventilated environment away from excessive moisture. Store completely dried material in a clean, airtight container in a cool, dry, dark location.
Tips for a More Successful Ashwagandha Crop
The simplest way to grow healthy ashwagandha is to focus on the fundamentals: warm conditions, plenty of sunlight, loose soil, moderate watering, and patience. Avoid constantly changing the growing conditions or adding fertilizer whenever growth appears slow.
Give plants enough space, monitor soil moisture instead of watering according to a rigid schedule, and keep weeds under control. If growing in containers, pay particular attention to drainage and root space.
With consistent care, ashwagandha can be a rewarding addition to a home garden. Once established, it is relatively low-maintenance and well suited to gardeners who prefer plants that tolerate periods of dry conditions.
Final Thoughts on Growing Ashwagandha at Home
Growing ashwagandha at home does not require advanced gardening skills. The key is creating an environment that matches the plant’s natural preference for warmth, sunlight, and well-drained soil. Starting with healthy seeds, maintaining moderate moisture, and avoiding excessive fertilizer can give young plants a strong beginning.
As the plants mature, patience becomes especially important because the roots need time to develop. By paying attention to sunlight, soil drainage, watering, and overall plant health, home gardeners can raise vigorous ashwagandha plants and harvest mature roots at the end of the growing season.
